|
The-Element
Everything bonsai
|
|||||||||||||
|
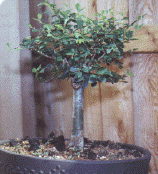
Creating the Broom StyleA classic style for elms, especially Zelkova serrata, is the broom style. This style is characteristic of many trees in nature and when done well conveys a realism of miniature nature to an extent seldom found in bonsai. Ideally, one should begin a broom style tree from seed and cultivate the natural style of a central leader surrounded by a multitude of branches leading from this spine which form the domed tracery of shoots. However, one can create another incarnation of the broom by cutting mature stock back and beginning the branching from this large cut. One should begin by selecting stock that has a round, straight, flawless trunk. Unlike many coniferous species and other styles, pruning scars and other flaws on the trunk of the broom style elm are not easily transformed into features. The surface roots on the broom styled tree should be somewhat "perfect" in how they radiate from the trunk, being neither uniform in spacing nor size. If the roots are imperfect, they can be re-made by ground layering the trunk once the canopy is formed.
The cut can be either straight across or in a "V" shape.
Be
Bind the upper part of the trunk with grafting tape or a plastic strip
bound with tape or raffia. It is often good to place some damp sphagnum
moss around the wound, but in any case do not allow the wound to dry
When the new shoots have become 5 or 6 inches long, select from 2 to 7
or so to be the new branches. The more you leave, the faster the
wound will heal, but also the more pronounced the swelling at the wound
will be. You can also select one to be a central leader, but the
final look will
At the beginning of each season, cut the branches back to where you want
the next splits in the ramification to occur. Your first couple
of years will be used to form the shape and distribution of the primary
branching. The
During the winter, it can be effective to gather the branches together
with string or tape. This serves to straighten some and
Don't let the primary branches grow too |
||||||||||||
 sure
to make the cut very clean as the new branches will come from the edges
of the wound. It can be good to hollow out the interior of the wound
somewhat. Make your cut about 3 times the diameter of the trunk
from the soil line.
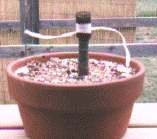 out. The binding is to prevent the swelling that is caused by the
emerging new shoots.
 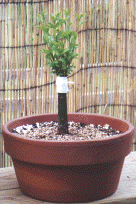 not
be as convincing as one grown in that style from seed since it will originate
on the periphery of the wound and not in the center of the trunk.
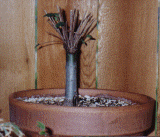 following years will be spent on ramifying the shoots. Leave the
binding wrap on the trunk for the first 1 to 2 years. If you take
it off too soon, you risk swelling at the base of the branching.
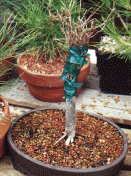 keep
the initial thrust of the primary branches in a more vertical line rather
than a more horizontal line.
  quickly
or too large. They are restrained by pinching of the shoots, which
should be done beginning in the second or third year. After only
a few years you should have a tree that is quite respectable and will,
with proper care, continue to improve each year.